17 Real-World Tips on How to Select Photos for Two Hours a Day
How to organize thousands of photographs–without going mad?
That’s the question I was up against: to cull three and a half thousand photographs taken during a month-long funded trek to Greenland into a book dummy and portfolio.
Where to start? What to do?
In the past, I would jump in without a plan. Or rather, the plan was to finish as soon as possible, spend 18-hour days cooped up in a small dark room, and constantly look at images–no matter what. Not only was this a miserable experience, but it is also a terrible way to select the best work.
After a bit of pondering, I instead limited myself to working only about two hours a day to avoid burnout.
Amazingly, this worked.
After about only six weeks, I narrowed down 3.5K images to about one hundred photographs. The “heavy lifting” was accomplished fairly quickly; after about another four weeks, I had a cohesive body of work. More importantly, besides avoiding pain and dread, I picked the best photos for a book dummy.
Here’s what I did.
Before I do, a huge thank you to Professor Steven B. Smith of RISD and graduate school classmate from Yale University, who initially taught me how to use Adobe Bridge as a selection tool.
1. Be Methodical and Intuitive
My approach was methodical and intuitive–at different times. Starting, I carefully went through thousands of images methodically. However, towards the end of the process, I relied much more on intuition to select the final best.
Important too is to keep an open mind throughout the whole process. Let go of any preconceived notions about how the photos were made or why they should be good. Instead, always follow the images themselves and see where they lead you. Think about how a stranger would review the work, and if they would find them compelling–they have no idea about your original intention or meaning beyond what they see. Take this approach as much as possible.
2. Gather All Photo Files in One Place
Gather all the photographs for the book project or portfolio in one place. This may be easy, or it could be a project in itself.
For each new body of work, I make one folder on my computer and place all images there. To make things even clearer, I use a separate hard drive partition used only for photos.
Get into the habit of downloading files as soon as possible to avoid the chance of losing images due to flash drive problems, file corruption, misplacement, etc. Then make a backup (as your should frequently do).
3. Avoid Duplicates
If you’ve done things right in the step above, having duplicate images should not be a problem. However, since this can be very problematic later, be extra sure there are no extra copies.
The quickest way to weed these out is to go to the file folder and sort by date. If any files have the same time and/or a very similar name, open them and compare. Then, double-check by searching for file names that seem suspicious or unusual too.
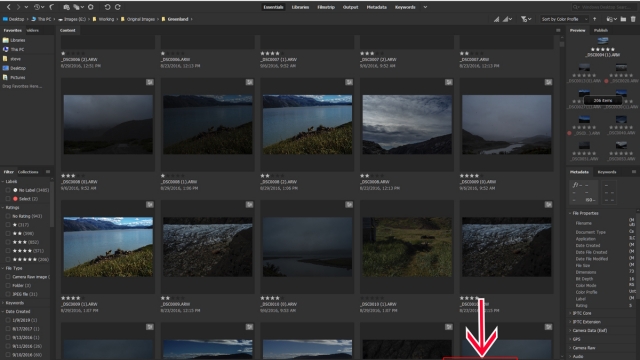
4. Work In Adobe Bridge
 Most of my editing work is done in Adobe Bridge (the rest is done in Adobe Camera Raw; see below). Since it’s an Adobe product, naturally, it seamlessly integrates with Photoshop CC. Also, there are handy mass editing processes in Bridge that make it an invaluable asset, such as selecting a bunch of images at a time and creating JPEGs or renaming files all at once.
Lastly, and most important for editing work, it has the ability to rate images by assigning stars to them. Again, this seemingly simple tool is actually essential for selecting images and is key to the editing process.
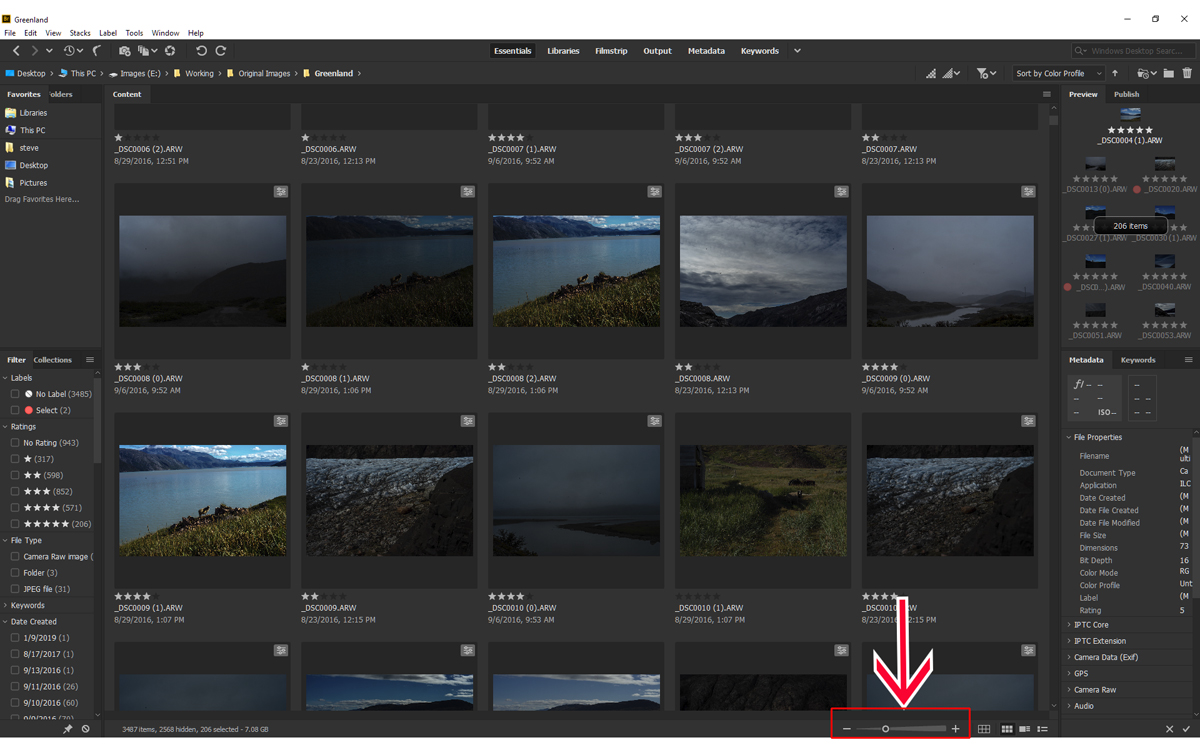
5. Work Only a Few Hours Daily
I find it best to start editing first thing in the morning and work only for a few hours a day. Working longer can result in eye fatigue or missing important photographic finds.
I take a mini-break for a moment or two every fifteen minutes or so–check email, look away, sip some water–to stay fresh. Then, about every hour, I take a five-minute break where I get up from my desk, go to the kitchen, and do something completely non-photography-related. Finally, whenever I feel unable to concentrate, I pause. Editing photos is a crucial process, so while I try to keep to a scheduled approach, I try not to rush or force things.
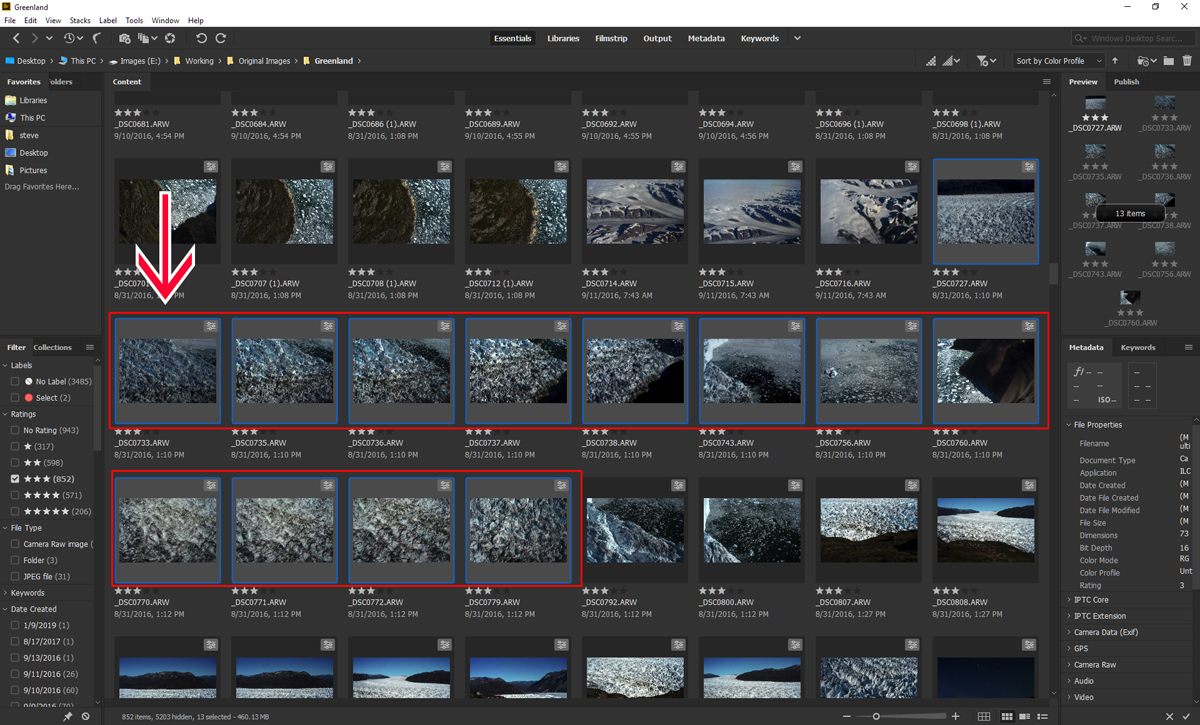
6. Rate Photographs in Rounds
Selecting images, especially if there are thousands, is best done methodically. Going through each photo carefully in Adobe Bridge using the built-in rating system is an efficient way to review work.
Don’t make copies of photos you like and copy them in separate folders because this gets confusing, clogs up your hard drive, and makes it difficult to evaluate and select the best images thoughtfully.
In Bridge, I typically look at every image and assign a star rating to it: the higher the star, the better. Usually, there are five rounds to whittle images down to the final best.
These are the several stages I use for image selection:
No Rating: The complete set of photographs before any review or rating, sorted by Date Created.
First Star: The first look at the images to determine if there are redeeming elements, it is in focus, is acceptably exposed, and is framed, for the most part.
Second Star: These have some interesting parts but might have flaws or problems, which might be grounds for elimination later.
Third Star: It generally is a good image, but unsure if it is excellent. Also, it could be similar to others.
Fourth Star: These are potentially great images and could be a finalist.
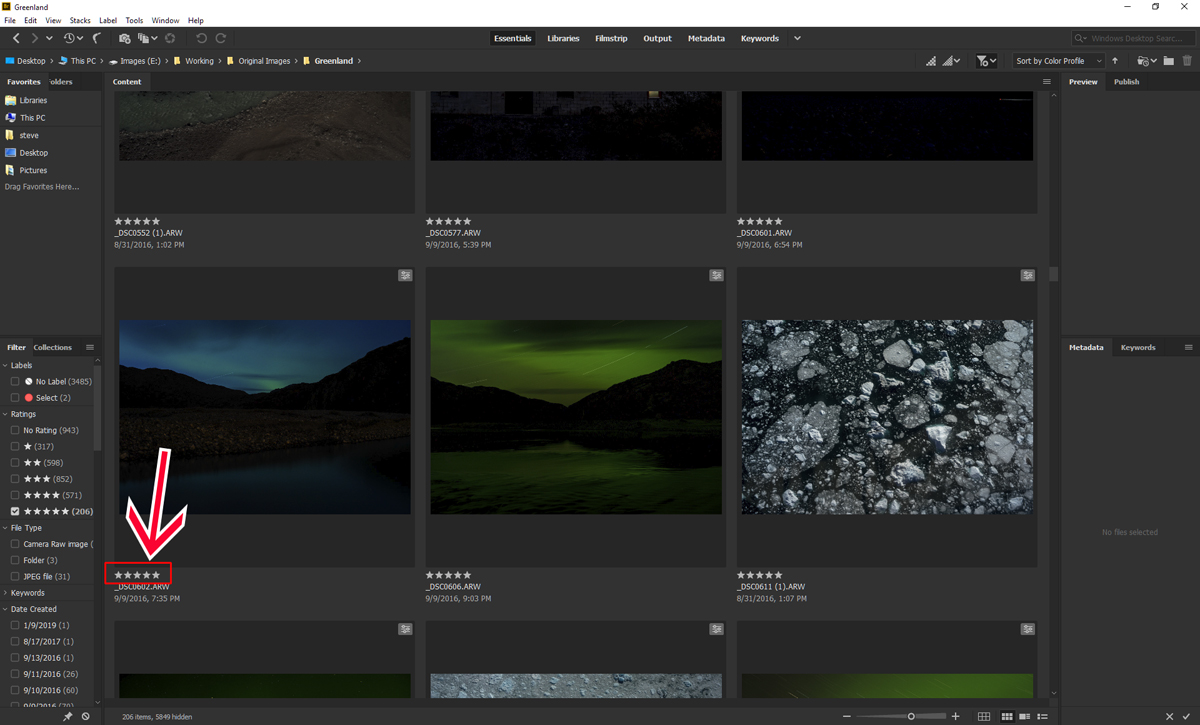
Fifth Star: These are excellent final photos to be considered for the book or exhibition.
For example, I started with 3,500 photos, and with each successive rating round, I roughly eliminated about half with each review, or:
0 star: 3,500
1 star: 1,500
2 star: 750
3 star: 375
4 star: 180
5 star: 80
In my case, I ended up with about one hundred photographs.
7. Look Carefully
Throughout the review process, look carefully at each photo. Pause on each, but don’t linger extensively or longer than necessary. How long? A few moments–enough to study the image and get a grasp of it.
This is where the two-hour limit rule especially comes into play because it can be difficult when looking intensely at a computer screen. Carefully reviewing work is especially important during the initial first or second rounds (One or Two-Star selections in Bridge) to not miss a good image among the hundreds or thousands.
8. Use Adobe Camera Raw (ACR)
Another editing tool that I use with Bridge is Adobe Camera Raw (ACR). ACR is a constructive way of editing and selecting photographs (by the way, this is where I do almost all color corrections, rather than in Photoshop CC). Usually, I start using ACR in about the middle of the review process (Two and Three Stars). I do this for a few reasons:
Sometimes before I can adequately review a photo, I need to make changes to exposure and density. ACR allows me to make edits using sliders quickly.
If a handful of similar photos have the same problem–they are the way to light, for example–I select and open them in ACR to make adjustments all at once.
Photos appear larger and are thus easier to review than in Bridge.
The same star system carries over from Bridge; changing or assigning them is simple.
Making comparisons between several similar or related images seems easier to do in ACR.
Comments are closed.